Showing posts with label recipes. Show all posts

Sunday, July 12, 2015

Chocolate Chip Cookies

I pulled out one of my Granny's old cookbooks.
This cookbook is very old and is a collection of recipes from the 
Catholic Daughters of America
Court Sacred Heart No. 797
Hallettsville, Texas


Just a small sweet little collection of recipes 
from some sweet women!


Granny would save a spot in the book with a clipping from
the newspaper. This happened to be a wedding announcement!
How cute is that!


Helen weds David!


These are super yummy!
Crispy on the outside and chewy in the middle!
Thank you Mrs. Gus Werner Jr.


I already ate three!! 
These puppies are super dangerous!

Thursday, May 28, 2015

Tex Mex 7 Layer Dip


If you have ever lived or visited Texas 
then you have tasted this all time favorite dip.
It is kind of a staple at Texas parties.
It is pretty basic but you can add your 
own personality to it. 
If you are a little spicy, you can fire up the heat.
If you are perky you can throw in a new layer 
to wake up your guests. I usually adapt it to what
 I have in the frig at the time needed. 
I usually make it in the morning on the day I need it.
If you use fresh avocados then you will want to make it 
the day needed because the fresh avocado 
will turn brown if it is made too far in advance.
If you use store bought avocado dip 
you can make it the day before.

Tex Mex 7 Layer Dip

Ingredients
1 can of refried beans (I use nonfat and organic)
1 16 oz Sour Cream
2 Cups of Shredded Colby and Monterey Jack Cheese
4 diced green onions
1 medium tomato diced
1/2 cup of chopped cilantro
1/2 stick of butter
1/4 tsp season salt
1/4 tsp garlic powder
1 Tbl of cumin
1 Tbl of chili powder
1 Tbl of Tabasco Sauce
1/2 tsp onion powder
3 or 4 medium avocados mashed with a Tbl of fresh lime and a dash of sea salt
OR  1 16 oz container of store bought guacamole dip

Soften refried beans with butter in a medium saucepan over low heat. 
Add 1/4 tsp season salt and 1/4 tsp garlic salt into beans. Once softened pour in the dish you will serve the dip in. Allow it to cool about 15 minutes until adding the next layer. In a medium bowl mix sour cram with cumin, chili powder, onion powder and Tabasco. This is where you can add more sauce or seasoning if you like. Just taste it with your cute little pinky finger and tweak it as you wish. When you are done tweaking the sour cream just dump and spread it evenly over the beans. Next up is the guacaMOLE! 
I like saying that....guacaMOLE!  Can you hear me? So here is the deal. 
You can cheat and use a store bought guac fake dip or make your own with a few avocados. It is up to you and how much time you want to invest in this dip. I have done both. So make the decision, own it and then spread it over the sour cream concoction. Next up the cheese. Spread the cheese on top of guac and then sprinkle the onions, toms and cilantro. Cover it up with plastic wrap and chill for a couple of hours or more. Serve it up with some good tortilla chips and of course some Big Scoop Fritos! 
Fritos are a must! If you really want to be daring add some freshly diced jalapeƱos on the top. If you do that then run and hide from your guest who can't take the heat. They will not be happy and surely will be looking for you! 

AND......You are going to want to make some QUESO!
So go HERE for the BEST (Mama doesn't lie) Queso recipe you will ever find!


AND.......You are going to want to make this amazing main course to dump all the dips on top of!    King Ranch Casserole is to die for!


Wednesday, May 27, 2015

Amazing Cake and Beautiful Baby Girl!


Oh Mama Is So Proud!
Proud of this sweet Baby Girl
and all that she is and will become!
She is so talented and beautiful inside and out
and while I could brag about her for days, today I'm gonna brag about her baking and cake decorating skills!

I promised you a recipe so here ya go!
This is the one she tweaked and tweaked after many attempts and taste tests! Not that we minded the taste testing sessions but this recipe was the final product and it is oh so good!

I have named it Bella Cake!

Bella Cake

1 cup sifted flour
1 cup sugar
1/2 tsp sea salt
1 1/3 cups of tap water
1 cup sour cream (whole milk)
2 Tablespoons Canola Oil
1 1/4 tsp Almond extract (organic)
1 1/4 tsp Vanilla extract (organic)
4 medium egg whites
Dash of Cinnamon
1 box of white cake mix (I use Duncan Hines)

Directions
I double this recipe to make 6 pans (2 of each size)

Grease and flour pans to be used.
Preheat oven to 325.
Gently stir the cake mix, flour, salt and sugar in a medium size bowl.
Add to the bowl water, oil, sour cream, extracts, cinnamon and egg whites.
Beat on low for about 3 minutes.

Pour into greased pans and bake until tops are brown about 25 minutes.
Test with a toothpick to see if it is done before bringing out of the oven.
Cool on wire racks.

Frosting recipes:
Inside layers - HERE
Outside Rosettes - HERE


Saturday, February 28, 2015

Chicken Pot Pie - Skillet Style


How good does this look!
GOOD
REAL
GOOD
Baby Girl #2 really likes, (correction) 
really LOVES
a
GOOD
Chicken Pot Pie
So we have studied many recipes and created 
our very own favorite pie!
We like to make it in a skillet as it makes the crust really crispy!
Crispy is important!
So here ya go mamas!

Chicken Pot Pie - Skillet Style 
3 Cups of chicken breasts diced and cooked (can be a rotisserie chicken if you like)
1 Cup of  diced celery
2 Cups of carrots sliced
3/4 Cup of onion diced
2 Cups water
1 Tablespoon of Knorr's Caldo Con Sabor de Pollo (or any other chicken bouillon)
2 Tablespoons of flour
1 Cup of Half and Half
1/2 Cup of water
Dash of nutmeg
Salt and Pepper to taste
2 Tablespoons of butter or margarine 
1 box of refrigerated pie crust

Take pie crust out of box to bring to room temperature.
Preheat oven to 425.
Cook carrots in a soup pot with 1 Tablespoon of butter and 1 cup of water for about 8 minutes on medium heat. Add onions and celery, cover pot and cook 5 minutes.
While this is cooking whisk the tablespoon of Knorr's in a small bowl with the 1 cup of water and set aside. Add flour and mix to coat all veggies evenly. Slowly add the chicken flavored water to the pot while stirring constantly. It will continue to make a thick sauce. Add half and half and continue to stir over medium heat. Add salt, pepper and nutmeg to pot. Add cooked chicken to the pot and stir on low heat for a few minutes and then turn off the heat. Butter your cast iron skillet with the remaining butter.
Line the skillet with one pie crust. Put the skillet in the oven for about 5 minutes. The sides may fall down but it doesn't matter. Take it out of the oven and add the chicken and veggie mixture and take the remaining pie crust and lay on top. Make a few slits with a knife to vent. Place the skillet in the oven and cover lightly with a sheet of foil. Cook for about 30 minutes and then add 5 minutes without the foil on top.
Take it out and EAT!
I like to serve this with a crisp green garden salad.
Such a comfort meal that mamas love to feed their babies!


Check out more recipes


Monday, August 5, 2013

Chinese Pepper Steak Mama Holli Style!


Before 


After

Long ago when Mama Holli's babies were young pups, she would load up her bus and haul the pups to Hallettsville, Texas to stay with Granny when her hubby traveled.
Granny LOVED to cook for her family but 
every now and then she
 would request one of us "GIRLS" 
to whip up some Chinese Pepper Steak.
It was a recipe not found in her usual amazing
repertoire of family favorites. Granny was Czech and Czech's did not cook up Chinese food, not even with a Texas twist. She would very quietly ask if I would mind making it for "DINNER" which was actually "LUNCH".
Then we would have leftovers for "SUPPER" 
which was actually "DINNER"!
This is the adapted recipe we would pull out.
The original was posted by Pam Post in the 
Holy Ghost Booster Club Cookbook
back in the 1970's!

Chinese Pepper Steak
1 1/2 lb Cubed Steak - cut in small bite size pieces
1/2 ts Ginger
1/2 ts Sugar
2 Garlic Cloves - minced
1/2 med Onion - sliced
1 Green Bell Pepper - sliced
1 med Tomato - sliced into wedges
1/2 C Soy Sauce
1 C water
1/2 C flour

Toss steak in flour. Brown steak in a skillet with about 3 tablespoons of oil. In a bowl mix soy sauce, ginger, and sugar. Add to steak and then add water. Gravy will thicken quickly. Add more water if needed to keep from sticking to bottom of skillet. Add garlic and simmer 10 minutes covered.
Add peppers, onions and tomatoes to meat, cover and cook on low until desired tenderness. Check every 5 minutes to see if more water is needed to keep from sticking to bottom as gravy will be thick. I usually cook for 10 - 15 minutes on low and then serve it hot over brown rice.
To spice it up add a little chili paste to your liking.


Have a Happy Day
and
REMEMBER
Nobody Puts Mama In A Corner!


Graphic courtesy 
of

The Graphics Fairy

Saturday, June 9, 2012

Perky Pancetta Bruschetta

Oh my I have been away for awhile! Sorry about that! I can breathe now that school is out and summer is here!
We have been cooking up a storm at our house. The girls and I made some wonderful bruschetta the other day! We added some fancy new ingredients! 
Check it out!

So here is the deal.........we whipped up some fresh pesto and added a touch of cream to it to soften it up. 
Then we fried up some pancetta! 
YUM! 
I wanted to eat it by itself! 
Chopped up some vine ripe tomatoes, threw them in a bowl and drizzled them with olive oil, sea salt and cracked black pepper. 
Grabbed some nice greens and tossed them in a bowl with some fresh lemon juice and olive oil.
 Snatched some goat cheese from the frig. 
Grabbed a loaf of french bread and 
started to assemble these puppies!
First layer - goat cheese
layer 2      - creamy pesto
layer 3      - toms
layer 4      - crispy pancetta
layer 5      - fresh greens

Spread them out on a baking tray and broil on high for about 2 minutes or until sides of bread are crispy!
You could heat these puppies up on the grill as well!
Then you add a smoky flavor to it......
DOUBLE YUM!
See ya later!
Mama is off to eat some pancetta!
I like to say it PANCETTA
PANCETTA
PANCETTA
PANCETTA


Thank you Graphics Fairy
for the perky mama pic!

Monday, March 8, 2010

Shades Of Blue


Mama Loves The Color BLUE!
It Does NOT
Make Me 
BLUE!
It Makes
Mama Happy!
This BLUE egg
is screaming
"LOOK AT ME"
I am here!
I am perky!
I am pretty!

This one too!

My Daddy's
BLUE  Baby Book
BLUE Pillows 
and a
BLUE Throw

A BLUE egg

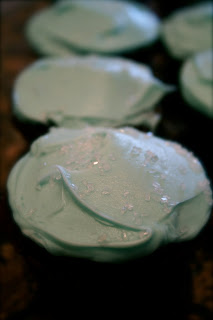
Baby BLUE Cupcakes
Made by Baby Girl #2
A BLUE Cupboard

Mama Nancy from Texas
made this for Mama Holli!

Here is another gift
from Mama Nancy!
Baby Girl #2
Made these BLUE
Meringue Cookies!

Look at these beautiful shapes!
Do You Want To
Make These?
1 cup of sugar

1/2 tsp cream of tarter
1 tsp almond extract
10-15 drops of food coloring
4 egg whites at room temperature

1. Preheat oven to 225 degrees
2. Beat egg whites in large bowl with electric mixer on medium speed until frothy.  Add cream of tarter and beat until soft peaks form.  Increase speed to medium-high.  Add sugar 1 Tbs at a time, beating until sugar is dissolved and stiff peaks form.  Beat in extract and food color until blended.  
3.  Drop by rounded teaspoons about 1 inch apart onto 2 large foil-lined baking sheets sprayed with baking spray.
4.  Bake both sheets of meringues at the same time for 45 minutes.  Turn oven off.  Let meringues stand in oven 1 hour or until cool.

A Mama in BLUE!
Pretty!!!
SO GO PLAY
in BLUE Today!

The Graphics Fairy

Wednesday, February 17, 2010

This Little Piggy Went To Market!

I have to confess
 I LOVE BACON
Pretty Much
ANYTHING
with
BACON!
OINK OINK!
The Big Bad Wolf 
Likes Bacon Too!

So This Recipe Is For 
All The Bacon Lovers
Out There!

Little Piggy Appetizer 
3/4 cup grated Romano or Parmesan Cheese
One Sleeve of Rectangular Club Crackers (Waverly Wafers is what I use)
1 pound sliced bacon (cut in half)

Preheat oven to 250 degrees.
Place about 1 teaspoon of the cheese on each cracker and wrap the bacon around it.  Stack a broiler rack on top of a cookie sheet to catch juices from bacon.  Place the wrapped cracker on the broiler rack seam down.  Bake for 2 hours.  No need to flip crackers.  Serve hot or at room temperature.

I know what you are thinking!  No they are not soggy!  They actually crisp up really nice! These are such a hit with the menfolk!
I made a batch of these and they were gone in 5 minutes flat! 
NO LIE! 
MAMA
DOES NOT LIE!
Piggies in a row
Ready to go in the oven!
Piggies 
All
Done!
Ready To Be Eaten!
Check Out These
Piggies from
The Graphics Fairy!


Pig Family
In the Snow
Pig Pets
Pig and a Gig
Poor Pig
RUN


Angry Pig
VERY ANGRY
PIG


Pig Delivering Mail
Looks Difficult!
He is Stressed!


Have a Great Day!
PIG OUT!